|
| Introduction |
| Introduction | construction-1 | Construction-2 | Construction-3 |
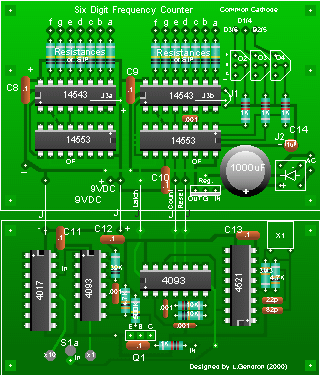
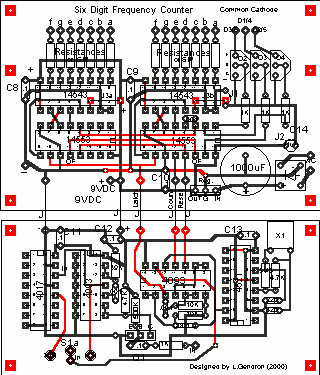
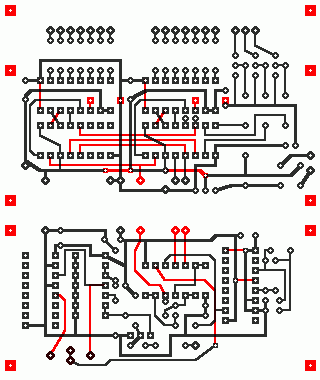
PCB Layout
Below is the layout for the six digit frequency counter . The layout reflects the designed circuit for common cathode displays with details of parts and jumpers as indicated for modifications as described preciously for the use of common anode displays .
The PCB has been designed into two separate PC boards that can be easily connected with jumpers or short wires . This to allow for a flexible installation at will in a small enclosure . On the other hand a single board can be made that would require a larger surface area and larger enclosure .
The upper part is the digital display circuitry and the lower part is the input and signal conditioning .
Care must be taken to locate the transistors polarity for common cathode or common anode operation as explained previously . Take note that C13 is a polarized capacitor and oriented to suit the supply polarity if modified . ( ref ; C13 and jumpers J1, J2 ,J3a&b )
The design will accept 14 pins Dip sockets in lieu of the 14 current limiting resistors allowing for the installation of SIP isolated resistors ICs or individual resistors with leads cut and shaped to fit the sockets for easy modification if required .
Introduction
Introduction construction-1 Construction-2 Construction-3
If you have any comments or questions email me at roma60@home.com © Laurier Gendron, Burnaby, B.C., Canada. 1998