The laser diode must have been unwrapped, the leads shorted with fine wire, and have been glued into the housing before it is installed in the PCB.
All the other components must already have been fitted to the PCB.
Attach your personal earth strap and earth the free end of the earth strap cable.
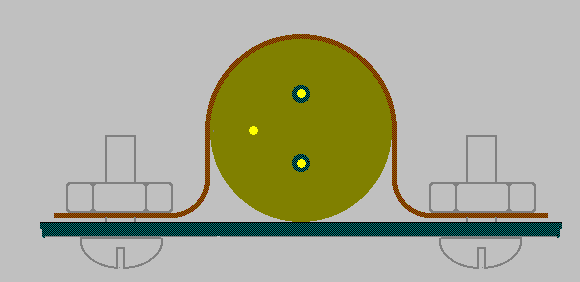
Loosely secure the laser diode assembly to the PCB using the copper saddle, using the screws and nuts provided.
Position the laser diode assembly axially so the back of the laser diode assembly is flush with the back of the saddle.
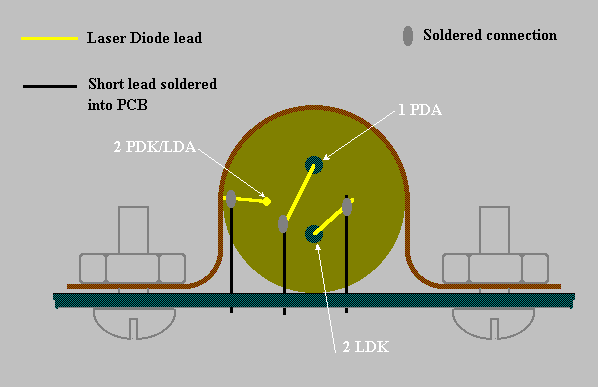
Rotate the laser diode assembly so that the leads are positioned as shown in the sketch below when viewed from R1.

Ensure the saddle is not touching any component leads, then tighten the screws sufficiently to hold the diode assembly securely in place without crushing it.
Solder the laser diode leads to the short lengths of lead previously soldered into the PCB, as shown below when viewed from R1.

Remove the fine wire wrapped around the laser diode leads.
The UPNLT is now ready to use.