
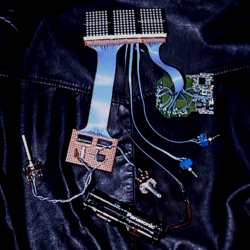
The fully-assembled Electromagnetic Variance Meter,
before being mounted in a project box.
The ten bargraph outputs from the EMF detector should be connected to the ten row inputs of the completed display matrix. This is best done with ribbon cable; it makes a much neater finished project.
The two sets of one-of-ten outputs from the display driver must be connected to the ten column inputs of the display matrix. Again, use ribbon cable.
Both the EMF detector and the display driver must be connected to a power switch and, therefore, to the power source. The author chose to connect the power switch and power source to the display matrix and distribute power to the display driver and EMF detector through the connecting ribbon cables.
Once all of these connections have been made, and all exposed conductors have been insulated, the circuit may finally be powered on. The rotary switch makes big jumps in speed, with three settings: fast, moderate, and slow. Depending upon the position of the potentiometer, one or two of the three settings may cause the sequencers to move so quickly as to light the entire display in a blur. Use the potentiometer to make fine adjustments in sequencing speed.
Turn on a television set or computer monitor; either will produce enough of an electromagnetic field to test your EVM. At close range, the display will light up all ten rows. Through experimentation, you can find the sequencing speed that best suits you.