THE PHOTOS
PHOTO 1 : TOP VIEW, SANS RADOME
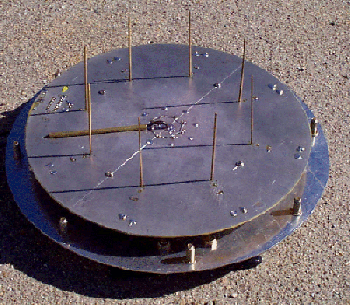
Top view of the mini - antenna with radome removed. Antenna elements were
directly soldered to the PC board, using 4 inch elements of 3/32 inch
braising rod. The RF output co-ax is threaded through a small brass tube which
is soldered to the top surface, visible here at the 9 o'clock position.
PC board is secured with 4 screws to standoffs anchored on the aluminum
baseplate. Ground planes on the top and bottom surface of the PC board are
connected together at several points by wire vias, visible here.
PHOTO 2 : BOTTOM VIEW, EXTERNAL
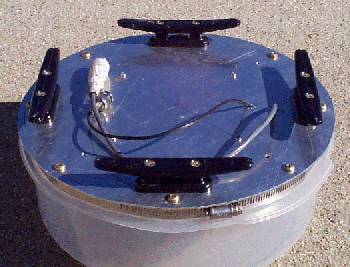
Bottom view of the mini-antenna. Deck cleats serve as ( crude ) feet, and
provide "padeyes" for the cargo strap which secures the antenna to the
vehicle. Eventually, two of them will be removed and rubber furniture feet
will be installed, instead. The plastic radome is secured to the baseplate
by means of a "choke clamp", ( visible in this photo ) which was contrived
with two 6 - inch automotive hose clamps, strung together "in series".
PHOTO 3 : BASEPLATE
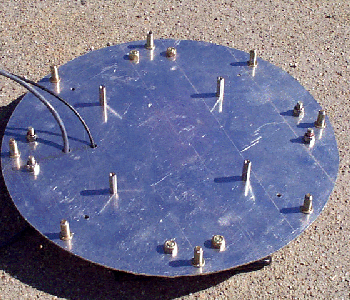
Top view of the aluminum baseplate, PC board removed. The four standoffs for
the PC board are visible here, as well as the eight stud bolts which mate
with the inside surface of the radome... these studs are located on the
extreme outside edge of the plate, and prevent the plastic radome from
collapsing when the hose clamp is tightened.
[HOME PAGE]
[NEXT PAGE]