2. Ultrasonic transducer - RS components Part No. 307-351 (or Maplin HY12N)
3. 12mH Fixed inductor - Toko part no. 181LY-123J Available from BEC Distribution.
4. 220pF capacitor (221) (Maplin part No. WX60Q or equivalent)
5. 180pF capacitor (181) (Maplin part No. WX59P or equivalent)
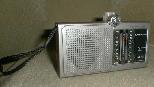
Note:- The Tandy Radio has now become obsolete. Similar modifications may be applied to similar cheap, AM, manually tunable radios. . Try removing the Ferrite tuning coil and then replacing it with an Ultra Sonic Transducer with a 12mH inductor connected in parralel.
2. Prise the case apart.
3. Remove the circuit board retaining screw and ease out the circuit board
4. Remove the aerial coil assembly completely, cutting off the three wires close to the coil. The wires stained Red & Green need to be retained, but the third unstained wire may be cut off at the tuning capacitor.
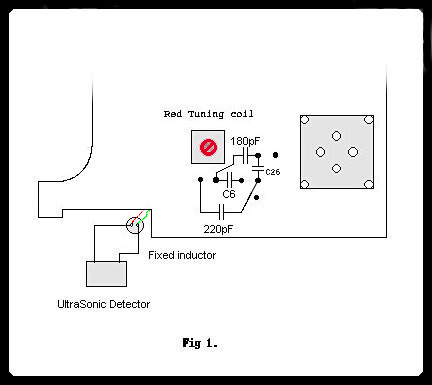
5. Remove capacitors C5, C6 & C26 (see fig 1). Note some versions of the radio may already have some of these components missing. It is necessary to remove the tuning wheel to gain access to the underside of the circuit board. Make a careful note of how the string is wound so that it can be correctly re-assembled later. It may also be necessary to melt away the sealing wax from the components with a soldering iron.
6. Fit and solder the 220pF and 180pF capacitors in the positions indicated in fig. 1.
7. Stick the inductor into the radio case with a strong glue. Leave its legs pointing upwards.
8. Mount the ultrasonic transducer on the outside of the case. It may be preferable to glue a block connector to the top of the case to mount this.
9. Connect the ultrasonic transducer to the inductor Using two short pieces of thin insulated wire to make the connections.
10. Solder the two arial wires (red & green stained) to the inductor terminals. If the end result is very noisy you may find that reversing the red and green improves the noise.
1. Set the tuning dial to 4.5 on the centre scale (0-10) to represent 45kHz.
2. Point the detector towards a TV set (switched on of course) and tune the red coil until the detector is picking up the line frequency (3 x 15.6 is approx 45kHz).
The centre scale will then very closely represent 0 to 100kHz and your detector should be quite sensitive in the range 25 to 60kHz.
The detector can also be tested by rattling a bunch of keys in front
of the device. This action produces many ultrasonic frequencies that will
be demodulated by the device.
The sound of a bat in flight can also be simulated by holding 2
X 2p Pieces loosely in your fist and shaking them from side to side.
Note: Oscillations, whistles and warbles may result if the volume control is turned up too high - simply turn down the volume. If this irritates you to distraction, simply replace R2 (5.6k ohms) with a 10k ohm resistor which will automatically reduce the volume.
Best of luck.
Return to Petes home page.
And here's some good Bat detector links:-